
DigitalOcean Initial Server Setup guide
In the following steps I’m working through those outlined in DigitalOcean’s tutorial Initial Server Setup with Ubuntu 22.04.[1] My commentary covers the actions outlined in DO’s setup instructions with my observations on the process.
Connecting to a VPS via SSH
The Secure Shell interface seems familiar to those of us who remember using command-line interface (CLI) systems like Microsoft DOS on PCs or earlier operating systems like BBC BASIC. SSH entails entering commands next to a prompt in an otherwise blank window. On MacOS and Linux machines, you do this using the built-in Terminal utility, while on Windows you’ll work from the Command Prompt.
On MacOS and Linux, locate Terminal with a system search and launch it. On Windows, search for ‘Command Prompt’ and launch the app. To connect to the server, type the following command substituting your_public_IP with your Droplet’s IP address shown on your DO project dashboard:
ssh root@your_public_IPI’ve pointed my fully-qualified domain name timmassey.website at my Droplet’s public IP, meaning that I can connect to the VPS using ssh root@timmassey.website instead of the root user at the public IP.
The command will return a message warning about connecting to the host because its ‘authenticity can't be established’:
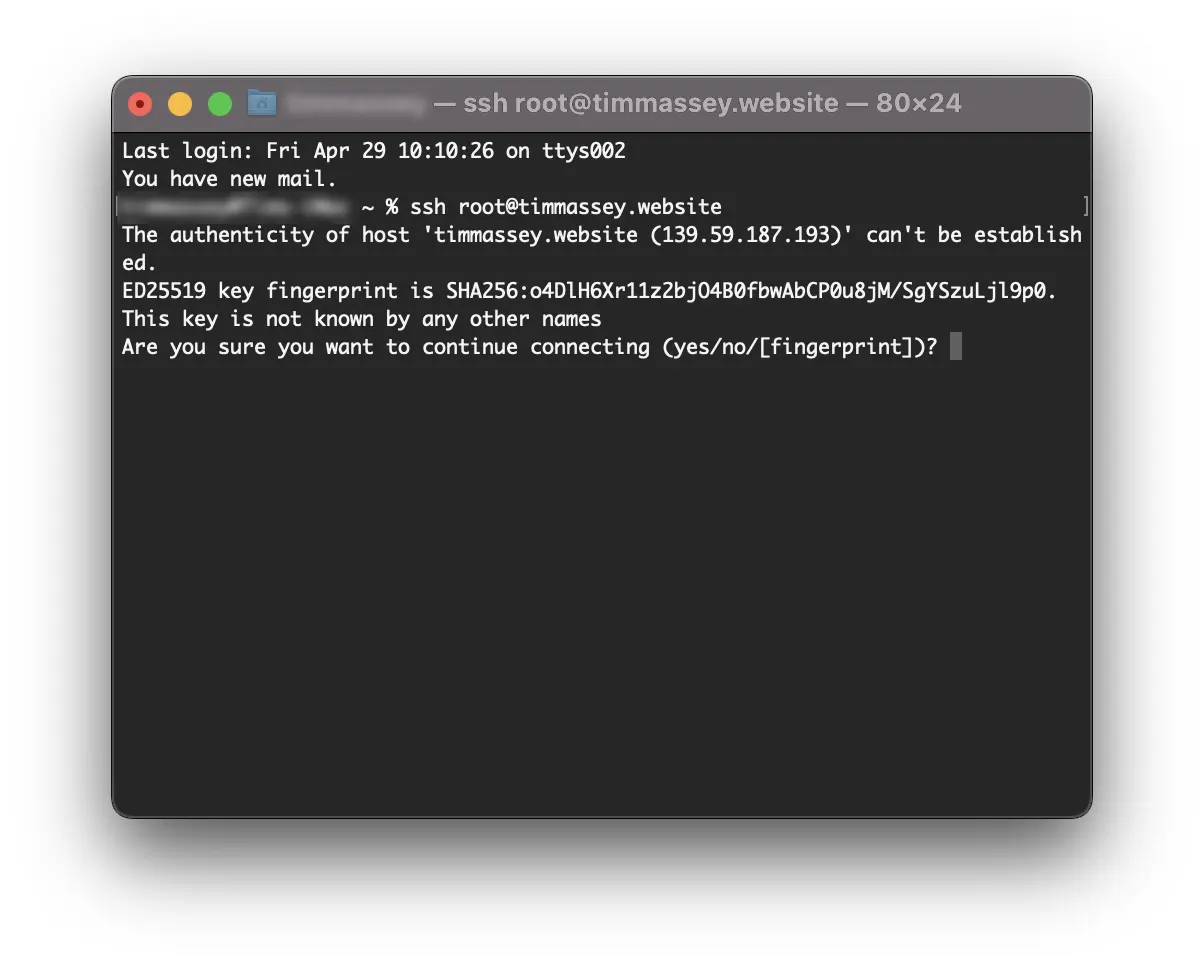
It’s safe to confirm the connection by typing yes and hitting return. Your computer warns you that it has added the server to its list of known hosts (it will recognise the server as a trusted connection in future) and asks for your root password. Enter the password you set when creating your Droplet — you’ll notice that the password cursor doesn’t move as usual as you type. Press the return key when you’re done and the system shows the Ubuntu 22.04 LTS login text.
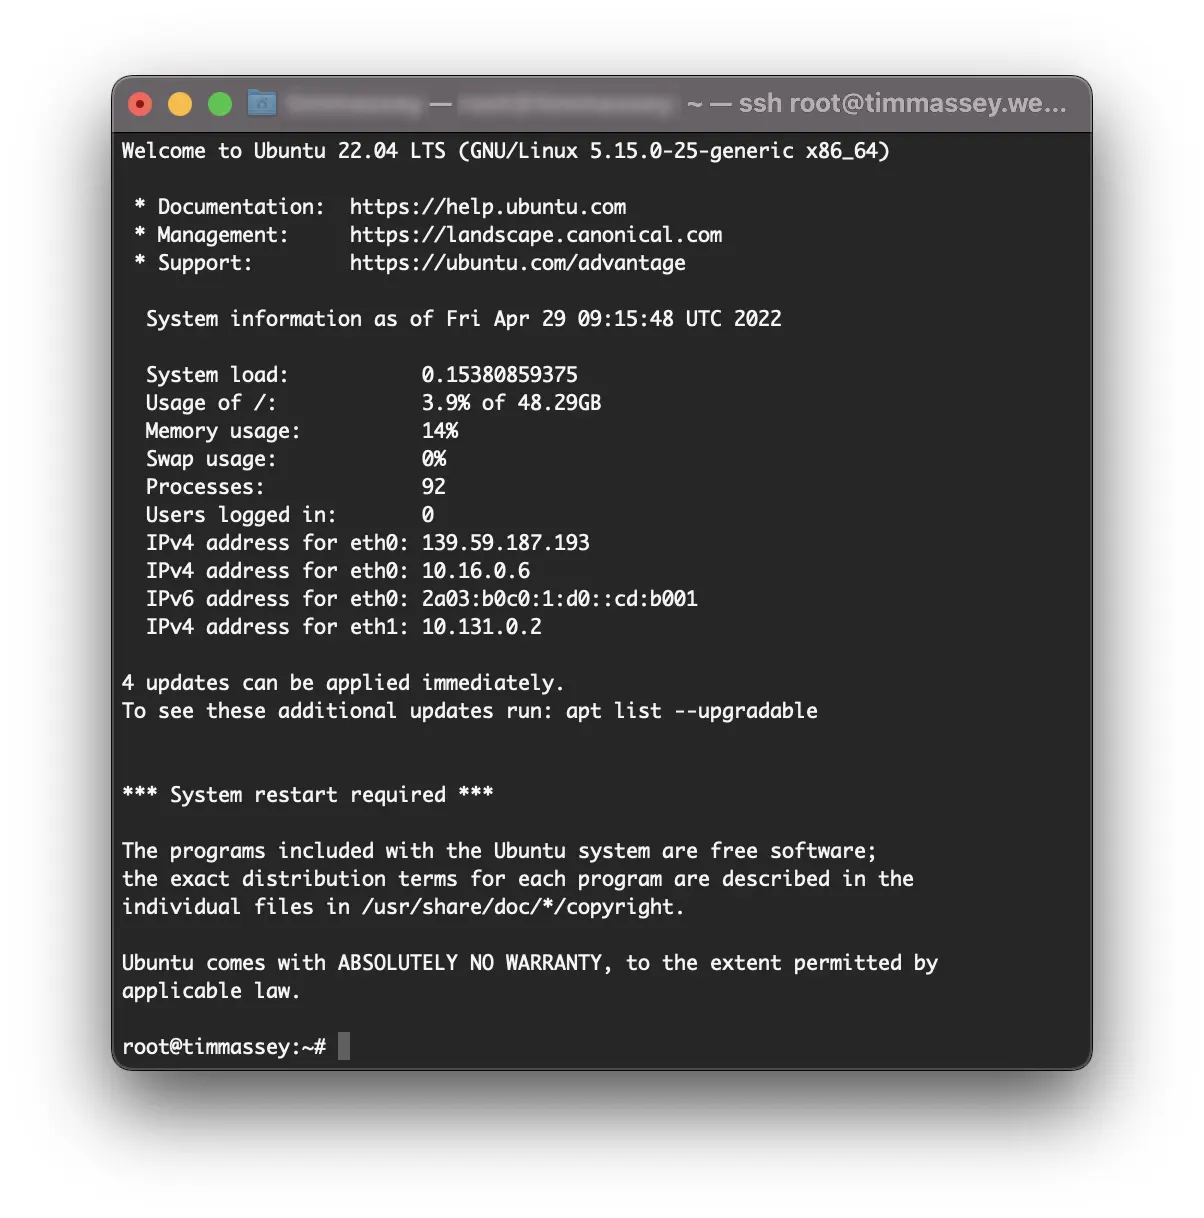
The server shows the root@your_server_name prompt. Because I named my VPS timmassey.website, the prompt is root@timmassey:~# — the tilde character (~) after the colon shows that the server session is logged into the home directory, and the hash (#) shows that I am logged in as the root user (also indicated by the first part of the prompt).
Some basic server maintenance
The login text in the above screenshot shows that ‘4 updates can be applied immediately’ to Ubuntu 22.04 LTS, and there is a ‘*** System restart required ***’. This is because the distribution has been updated since the version DigitalOcean deployed as its installation image. It’s necessary to update the software regularly when we have the server up and running, and this is a good place to introduce some basic housekeeping commands to help keep things in good order.
Enter the following whenever you see that updates are available — this is particularly important if they are security updates. (Note that, after we set up a non-root user below, we’ll need to enter ‘sudo’ before these commands, but more about that later…)
The first thing to do here is to update the repository lists so that our server has the latest information on the updates available from Ubuntu. Enter this at the hash prompt:
apt-get updateThe system scrolls rapidly through fetching the updates available from DigitalOcean’s mirror repositories.
Now install the updates with:
apt-get -y dist-upgradeIt takes a moment or two for the upgrades to flash past until the cursor arrives back at the hash prompt. If the installer shows you package configuration options just accept the default options to continue with a vanilla installation.
Next, a couple of commands to tidy up. These are:
apt autoremoveIf the system asks if you want to continue with the removal of packages, type Y to do so. When this process is complete, enter:
apt autocleanapt autoremove purges the server of superseded files and apt autoclean checks that the directory structure is in order.
The remaining outstanding bit of housekeeping is to restart the server with a straightforward:
rebootThis closes the SSH connection with the server and returns you to the system prompt of your local machine. Wait a few moments while the server restarts before re-establishing the connection with:
ssh root@your_public_IPThe update and restart prompts will have gone from the login text.
We now have a foundation on which to build the stack. Before putting the web server software in place, though, there are a few steps to take to secure the virtual machine.
Essential server security setup
Creating a non-root user
The first login to a newly-minted VPS is necessarily as the root user. root is the main administrative identity for Linux-based operating systems and it has full operating rights on the server with the capacity to create, add, remove, and update all files and directories. This is a security risk because anyone logging in as root has full control of the server. There’s also the risk that a legitimate operator working in root will use damaging commands by mistake. For these reasons, it’s standard practice to create a non-root user with root privileges for general use. As I’ll show, the system challenges non-root users when they use commands that require root privileges to help prevent unauthorised or unintentional actions.
Having logged into the server as root, the way to create a new user is by issuing the following command — I’m using lempstack as a username here, but you can pick a username to suit:
adduser lempstackThe server creates directories associated with your new username and then asks you for a new password. Visit your favourite online secure password generator, create a new one, make a careful note of it, then copy it at the server’s password prompt and re-enter it to confirm it. The server now asks for your full name and some contact details. This information might be helpful if you’re setting up the server for use by a number of operators within an organisation, but it’s not essential to the setup — you can just hit return to leave each field blank.
Bestowing superuser status
We’ve now created a new user account, but this doesn’t yet have root privileges. The way to grant them is by adding the user to the ‘sudo’ group. sudo is a Linux command[2] — a contraction of ‘superuser do’ — that (as we’ll see later) users with root privileges enter before typing commands that require that level of access.
Add your new user to the sudo group with the following command (again my example username is lempstack, and you need to replace this with the username you chose):
usermod -aG sudo lempstackServer responses
The operating system is quite surly and often won’t give you any feedback after executing a command — it just does it. The above command, for example, will just return you to the root system prompt (#) after adding the new user to the sudo group, but it has done the job despite the lack of response. Often little response from the server is a good sign.
Enabling the firewall
Ubuntu’s built-in firewall is inactive by default and the next step is to configure it so that it allows approved contact with the server. The work we’re doing here is via OpenSSH, so it’s important that the server accepts contact through this app otherwise it will lock us out.
To find out which apps the firewall will allow, enter:
ufw app listThe server responds with:
Available applications:
  OpenSSH
OpenSSH is the lone application installed so far on our fresh instance of Ubuntu 22.04 LTS, which is why there are no other apps in this list. Activate OpenSSH by entering:
ufw allow OpenSSHThe server comes back with:
Rules updated
Rules updated (v6)
Now we’ve allowed the OpenSSH connection, it’s safe to enable the firewall with:
ufw enableThe system warns about the possible risks of enabling ufw, but, as we’ve taken care to preserve our OpenSSH connection, we can allow the action by responding with a y as follows:
Command may disrupt existing ssh connections. Proceed with operation (y|n)? y
Firewall is active and enabled on system startup
To double-check that our SSH connection won’t be cut when we restart the system, we can ask it to list the enabled apps with:
ufw statusThe server confirms that ufw is active and shows the apps to which it allows access and from where it allows this:
Status: active

To                         Action      From
--                         ------      ----
OpenSSH                    ALLOW       Anywhere
OpenSSH (v6)               ALLOW       Anywhere (v6)
OpenSSH is the only app enabled at present, so we’ll need to add others as we build the LEMP stack, but we can be sure that we’ll be able to communicate with the virtual machine via SSH now the firewall is active.
Setting up SSH key authentication
DigitalOcean SSH Keys setup guide
To set up the SSH keys, I’m switching to DigitalOcean’s tutorial How to Set Up SSH Keys on Ubuntu 22.04.[3]
Before moving on to connect to the server using the non-root user account we created, this is a good point to set up SSH key access. As I noted in the previous post, you can add SSH keys when creating your Droplet allowing you to log in as root without using a password. I prefer to add the SSH keys during the setup process as it feels like a natural part of securing the server.
SSH keys are a way to log in via SSH that’s both simpler and more secure than using passwords. They are divided into pairs with public and private components. Private keys stay in a directory on computers you use to connect to the server, while you copy the public key to a similar directory on the remote machine. When you log in to the server, SSH checks that the public and private keys match and allows the connection if they do. It’s possible to set a password in addition to SSH keys if you prefer a belt-and-braces approach to server security, but if your computer is secure and only you have access to it, SSH keys can do away with needing to enter another password.
Generating a SSH key pair
Avoid overwriting existing key pairs
Skip this part of the process if, like me, you’ve generated a key pair previously that you’re using to log in to other VMs. Generating a new key pair will overwrite your existing keys, locking you out of your other setups. If this is your situation, go to Copying the public SSH key to the server below. If you haven’t generated a key pair yet, you will need to do the following.
You need to generate a key pair on your local computer, not on the server on which you’ve been working, so open a new Terminal window on MacOS or Linux or a new Command Prompt window on Windows, and enter:
ssh-keygenThe system responds with:
Generating public/private key pair.
Enter file in which to save the key (/your_home_directory/.ssh/id_rsa):
Hit return to save the key pair in the directory shown.
If you’ve generated a key pair previously, the system will warn you:
/your_home_directory/.ssh/id_rsa already exists.
Overwrite (y/n)?
This is your last chance to avoid losing your existing keys and with them access to your other servers permanently — answer n and go to Copying the public SSH key to the server. If you reply y or just haven’t generated keys before, you should be prompted to:
Enter passphrase (empty for no passphrase):DigitalOcean’s tutorial[4] recommends setting a password here, and this is the more secure way of logging in — using both SSH keys and a passphrase associated with them.
After you’ve typed and retyped the new password, the system displays the SSH key details:
Your identification has been saved in /your_home_directory/.ssh/id_rsa.
Your public key has been saved in /your_home_directory/.ssh/id_rsa.pub.
The key fingerprint is:
SHA256:Hbpy/0y+jYcvgAcmlH1vJyaX55xnLnOAzL3SUYtWlhg username@host
The key's randomart image is:
+--[ED25519 256]--+
|       o         |
|      o . .  E   |
|     .   ... .o .|
|      . oo..B.o+.|
|       oSo.B O+o.|
|        ..o +oB.o|
|      . o. .oo B |
|       o . ++o* o|
|          ..**o+ |
+----[SHA256]-----+
This completes the process of generating an SSH key pair. You’re now ready to copy the public key to the server.
Copying your public SSH key to the server
Switch to working on your local machine
If you skipped the above section on generating SSH keys, you need to copy your existing ones from your local machine and so need to do the following using a local command line. To keep the root connection with the server, open a second Terminal or Command Prompt window and do the following in it.
DigitalOcean’s tutorial[5] offers three ways of copying your public SSH key to your server — doing so automatically using ssh-copy-id, via SSH or manually. While I’m taking the ‘scenic route’ in much of this walk-through, here I’m going to go the easy way — follow DO’s guide if you’d like to copy your public SSH key to your server via SSH or manually.
Despite what DO’s tutorial says about its being included by default in most operating systems, I found I needed to install ssh-copy-id when trying to use it the first time on MacOS. You can find information on installing the utility on a Mac on the ssh.com website,[6] which also offers a guide to generating the keys. ssh-copy-id is native on Linux, but unavailable on Windows, so you’ll need to work through the section of DO’s guide on copying the keys manually if you’re working with a Microsoft operating system.
Using ssh-copy-id, it’s just a matter of using the command and specifying your username and server to which your public SSH key is to be copied. As we’re going to use the non-root username we created earlier to connect to the server, we need to copy the SSH public key to that account. Enter:
ssh-copy-id your_non-root_username@your_public_IPYou’ll be asked for the password for the non-root username we set earlier, and ssh-copy-id copies your public SSH key to the server — as DO’s guide points out, it copies the ~/.ssh/id_rsa.pub key from your local computer and adds it to the authorized_keys file in your non-root user’s home directory (/home/your_non-root_username/.ssh/authorized_keys) on the remote host.
Check that this has worked by attempting to log into your server with:
ssh your_non-root_username@your_public_IPIf you set a passphrase for your SSH private key, you’ll be prompted for this, if you didn’t set one (and all has gone well), you’ll log in immediately. (Notice that the command prompt when logged-in as a non-root user is a $ instead of a # when logged-in as root.) The next step is to disable password access so that users can only connect to your server using the relevant SSH key pair.
Disabling SSH password access
Make sure you have SSH key access to your server
Since this step will block the way in which we’ve connected to the server so far, it’s important to be sure that SSH key access is working or we’ll be unable to log in again. If you were able to log in with your non-root username after copying your public SSH key, it’s okay to go ahead with the following changes. It’s wise to open a second Terminal or Command Prompt window and log in again so that you’ll still have an open connection to reverse the process if you find that you’re unable to log in after disabling password access.
Having logged in using our newly-created non-root username, we’ll now use this in preference to the root user with which we performed the initial setup. Many of the commands we’ll be using here require root privileges, so we’ll need to enter sudo before the commands to be able to run them.
The way to disable SSH password access is by making changes to the SSH daemon‘s[7] configuration file, sshd_config, located in the server directory /etc/ssh/. To do this, we’re going to use the nano editing tool.
Using nano
I’ve often attempted to use nano in the way I would a basic desktop text editing app — particularly when it comes to copying and pasting code from and to it. nano is more rudimentary than its desktop equivalents, though, and you need to get used to its differences to WYSIWYG text editors. The utility overlays the commands you have typed previously in your server session, but this doesn’t form a separate window as it would on a desktop. If, for example, you were to try to select all the code in the nano editor and copy and paste it into another application, you’d find that you had copied the entire contents of the current SSH session — your previous commands and the server’s responses to them — as well as the relevant code. This can mean that you’ve copied a substantial amount of irrelevant text from which you need to pick the pertinent part. nano displays a series of menu options (see the screenshot below) that you access by pressing ctrl and the relevant option letter. It helps to get used to editing using nano‘s menu options rather than attempting this using the more familiar desktop manoeuvres.
To edit sshd_config in nano type:
sudo nano /etc/ssh/sshd_configYou’ll need to enter the password you set for your non-root username to run the sudo command — the system won’t ask for your password every time for a short succession of sudo commands, but it will require it again if you allow enough time to elapse between instructions.
nano displays as follows:
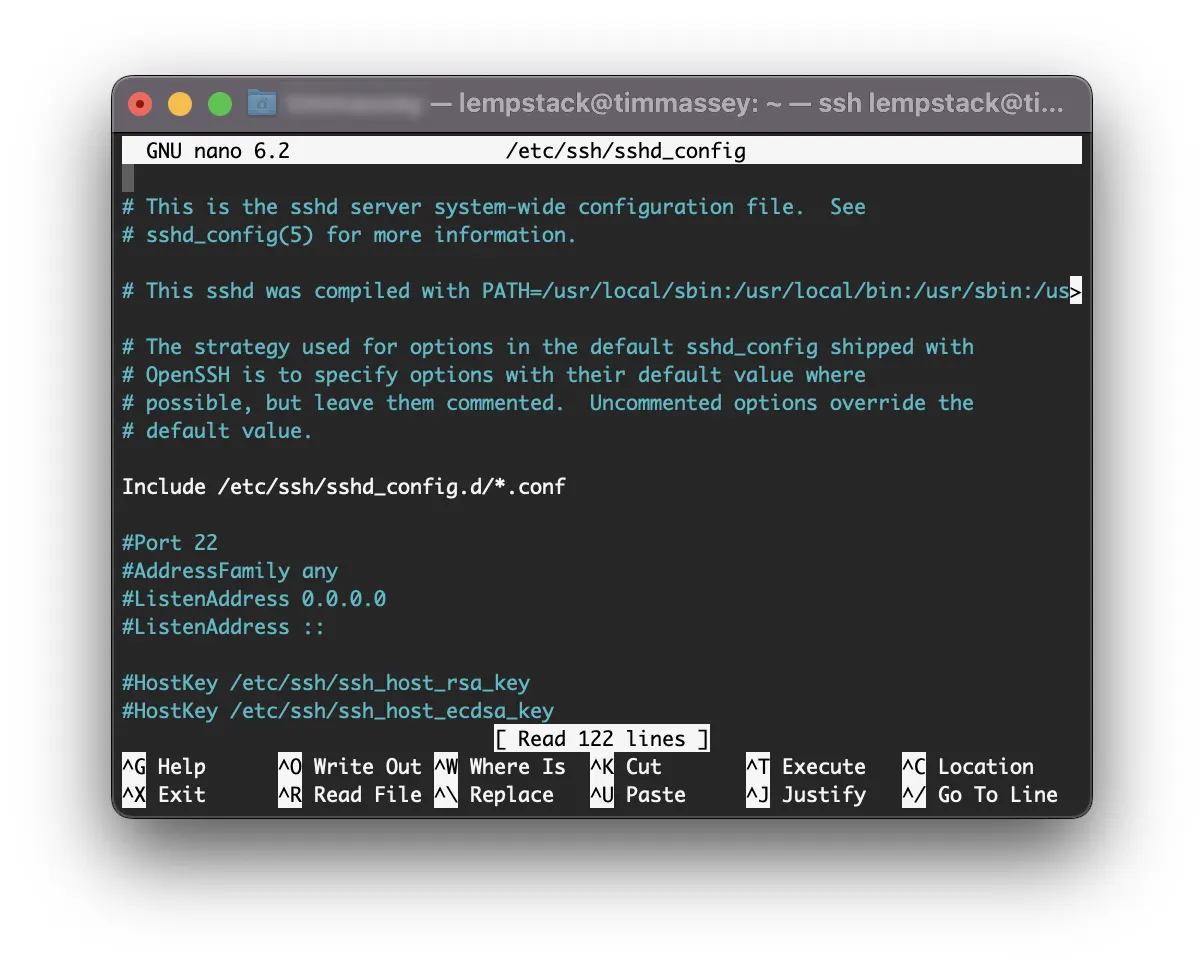
sshd_config with nanoPress ctrl and W to activate nano‘s ^W Where Is menu option, type PasswordAuthentication into the search field and hit return. nano brings you to the relevant directive (setting) as follows:
# To disable tunneled clear text passwords, change to no here!
PasswordAuthentication yes
As the comment above the PasswordAuthentication directive says, you need to change PasswordAuthentication yes to PasswordAuthentication no. When you’ve done this, save and exit sshd_config by pressing ctrl and X, answering y to save the changes, and hitting return to save them with the same file name.
To run the SSH daemon with the amended configuration, we’ll need to restart SSH by entering:
sudo systemctl restart sshWe’ve now disabled password SSH access, so it’s important to check that we can still log in without it. DO’s guide recommends opening up a second Terminal or Command Prompt window to check that you can still log in. In the new window, enter:
ssh your_non-root_username@your_public_IPIf the remote host reconnects after asking for your private SSH key passphrase (or not, if you didn’t set one), you’ve taken the above steps to secure the server successfully. If not, you’ll need to explore using your open connection to find where you’ve gone wrong.
We’ve now completed the initial steps, put the L into LEMP stack, and can progress to installing Nginx.
Notes and references